Hey folks, I post some articles about technology and tricks & tips how to do some stuff in dev environment. 🚀
My CV page is here.
Have your own GitHub-like service!
Table of Contents
Today I’ll show how to deploy your own Cloud Git Repository Service. This article is from Self-Hosted Services series which perfect fits for your home lab :)
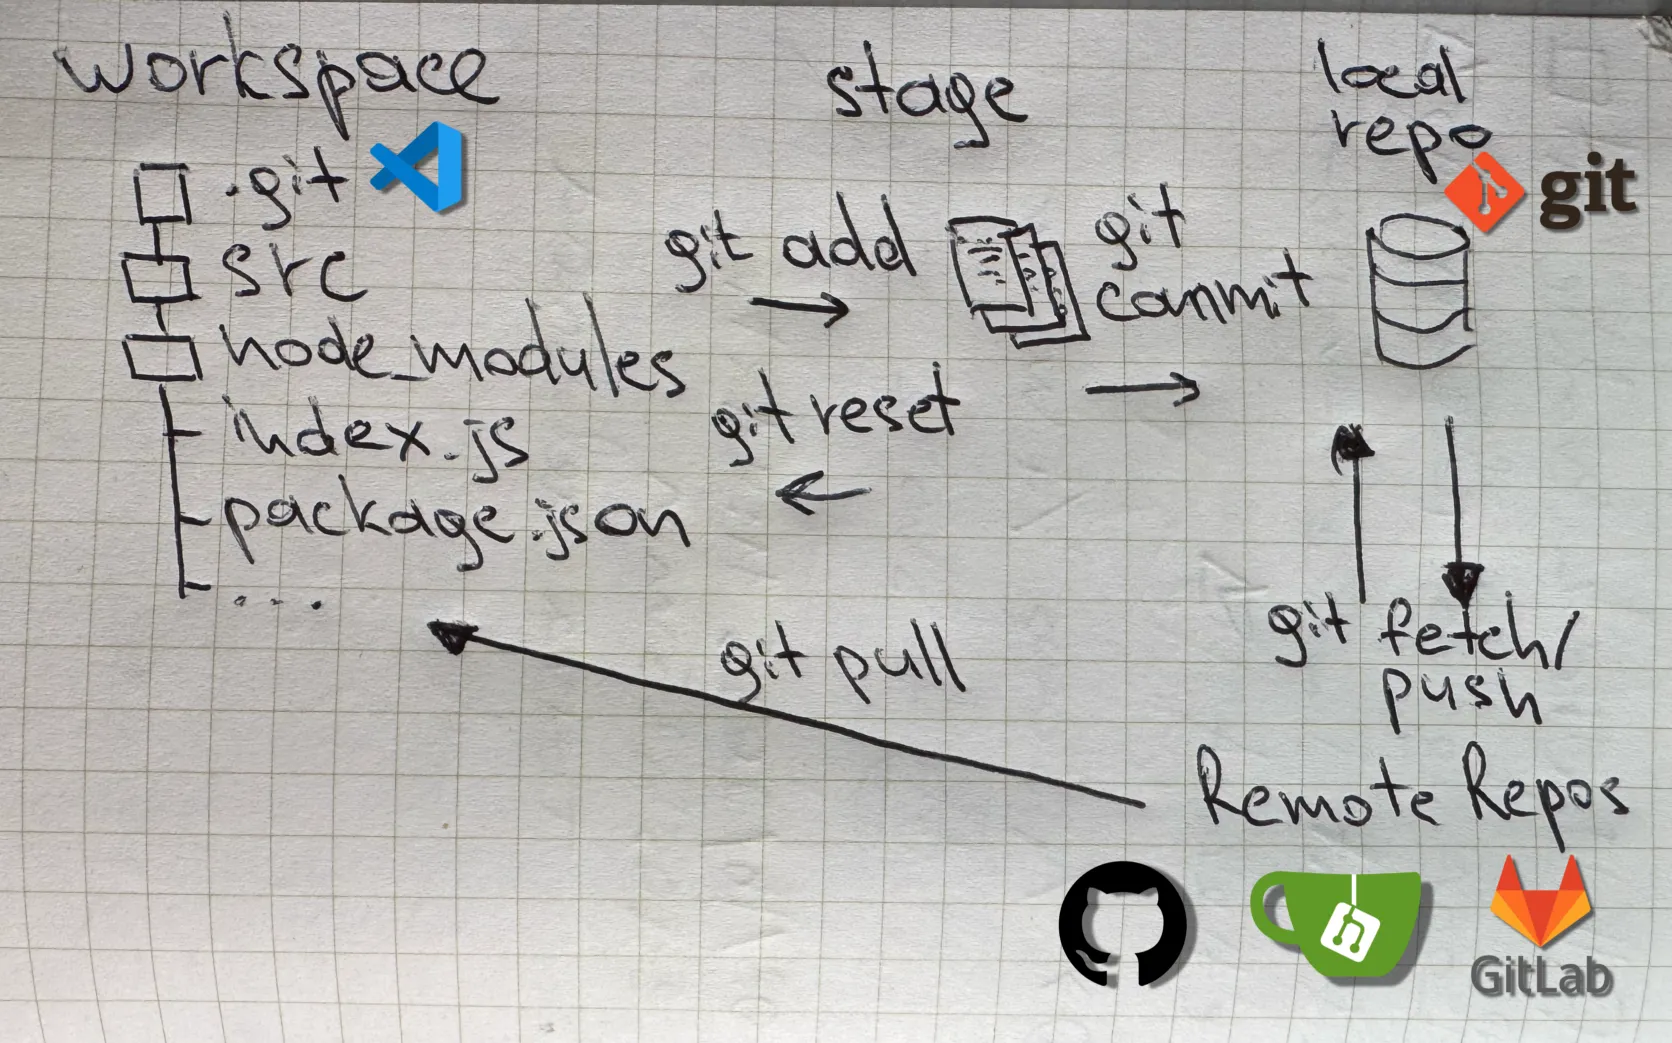
When you’re working on software development, it’s important to manage your source code efficiently and keep track of changes. Source code management (SCM) systems are tools that help you do this. They provide a way for you and your team to work together on projects of any size, no matter how many people are involved. There have been different SCM software options over the years, like CVS, SubVersion, Perforce, and Mercurial. But the most popular one now is Git, which is used with sites like GitHub, Bitbucket and GitLab.
The problem is that free accounts on these sites are mostly for open-source projects. If you want to work on private or proprietary software, there can be costs involved. Plus, you have to rely on an external organization for access to your code, which may not be ideal.
To solve these issues, there are self-hosted solutions you can use, like Gogs, Gitea, and GitLab. In this tutorial, we’ll focus on setting up Gitea, which is one of the more popular options. It allows you to host private repositories and manage your own projects from start to finish. Gitea is easy to deploy because it’s small, self-contained, and doesn’t need a lot of hardware. We’ll be using a Docker installation of Gitea, which helps keep the software up to date.
Prerequisites:
- VDS (Hosting) or your local machine with outgoing access (Static Public IP required)
- Docker CE (with Docker Compose Plugin) on target server machine
- Domain Name (Optional)
Prepare Server OS: #
Gitea, similar to other source code repositories, utilizes SSH for remote repository access. This feature enables users to have control over their code by managing their SSH keys directly within Gitea. However, to enable users to access the host machine via SSH, it is necessary to create a git user on the host. This initial step is essential as it allows you to obtain the user and group ID required for accessing the user’s account.
First of all, need to create the user on the host:
sudo adduser --system --shell /bin/bash --gecos 'Git' --group --disabled-password --home /home/git git
Output looks like that:

Create docker-compose.yml for Gitea: #
Let’s create folder for our config:
mkdir ~/gitea
cd ~/gitea
After that we need create our config:
sudo vi docker-compose.yml
Copy that into the new config:
version: '3'

networks:
  gitea:
    external: false

services:
  server:
    # Specify here which image should be used
    image: gitea/gitea:latest
    container_name: gitea
    environment:
      - USER_GID=[GID value from Prepare Server OS]
      - USER_UID=[UID value from Prepare Server OS]
    restart: always
    networks:
      - gitea
    volumes:
      - ./gitea:/data
      - /home/git/.ssh/:/data/git/.ssh
      - /etc/timezone:/etc/timezone:ro
      - /etc/localtime:/etc/localtime:ro
    ports:
      - '127.0.0.1:3000:3000'
      - '127.0.0.1:2222:22'
Save the config by :wq
Afterwards in terminal type the following command:
docker-compose up
Output looks like that:
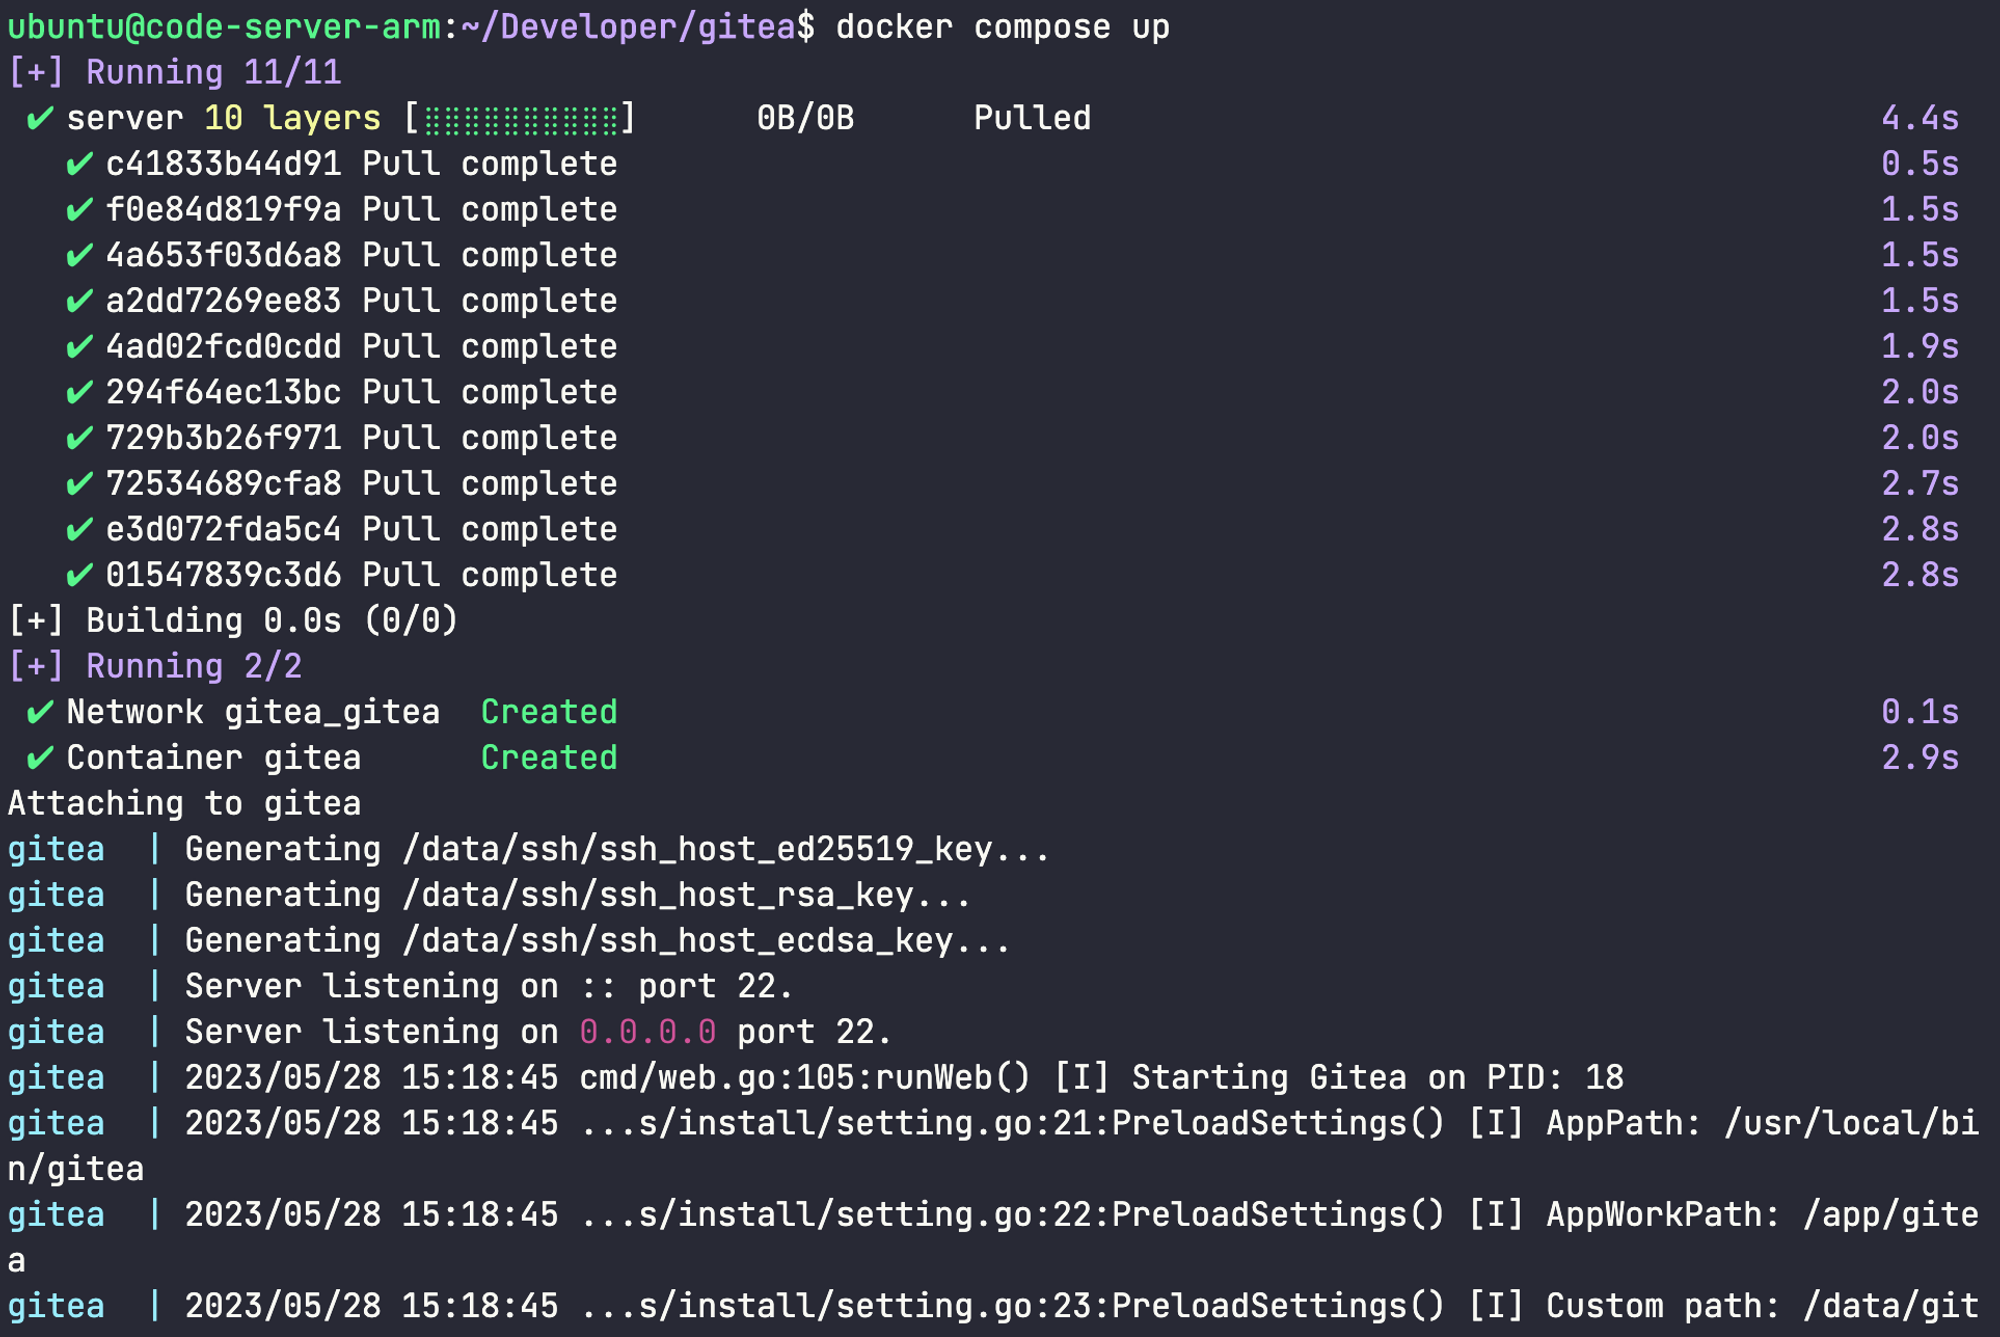
In order to run container as detached you should use the following command instead previous:
docker compose -d
You’ll see running container:
ubuntu@code-server-arm:~$ docker ps
CONTAINER ID   IMAGE                COMMAND                  CREATED      STATUS       PORTS                                              NAMES
66cf622e21d5   gitea/gitea:latest   "/usr/bin/entrypoint…"   2 days ago   Up 2 hours   127.0.0.1:3000->3000/tcp, 127.0.0.1:2222->22/tcp   gitea
ubuntu@code-server-arm:~$
Usually, I check availability of a fresh one running service by curl like this:
ubuntu@code-server-arm:~$ curl localhost:3000
<!DOCTYPE html>
<html lang="en-US" class="theme-auto">
<head>
        <meta charset="utf-8">
        <meta name="viewport" content="width=device-width, initial-scale=1">
        <title>Gitea: thisroman.dev</title>
        <link rel="manifest" href="data:application/json;base64,eyJuYW1lIjoiR2l0ZWE6IHRoaXNyb21hbi5kZXYiLCJzaG9ydF9uYW1lIjoiR2l0ZWE6IHRoaXNyb21hbi5kZXYiLCJzdGFydF91cmwiOiJodHRwczovL2dpdC50aGlzcm9tYW4uZGV2LyIsImljb25zIjpbeyJzcmMiOiJodHRwczovL2dpdC50aGlzcm9tYW4uZGV2L2Fzc2V0cy9pbWcvbG9nby5wbmciLCJ0eXBlIjoiaW1hZ2UvcG5nIiwic2l6ZXMiOiI1MTJ4NTEyIn0seyJzcmMiOiJodHRwczovL2dpdC50aGlzcm9tYW4uZGV2L2Fzc2V0cy9pbWcvbG9nby5zdmciLCJ0eXBlIjoiaW1hZ2Uvc3ZnK3htbCIsInNpemVzIjoiNTEyeDUxMiJ9XX0=">

        <meta name="default-theme" content="auto">
        <meta name="author" content="Gitea - Git with a cup of tea">
        <meta name="description" content="Gitea (Git with a cup of tea) is a painless self-hosted Git service written in Go">
        <meta name="keywords" content="go,git,self-hosted,gitea">
        <meta name="referrer" content="no-referrer">


        <link rel="icon" href="/assets/img/favicon.svg" type="image/svg+xml">
        <link rel="alternate icon" href="/assets/img/favicon.png" type="image/png">
        <link rel="stylesheet" href="/assets/css/index.css?v=1.19.3">

<script>
        window.addEventListener('error', function(e) {window._globalHandlerErrors=window._globalHandlerErrors||[]; window._globalHandlerErrors.push(e);});
        window.config = {
                appUrl: 'https:\/\/git.thisroman.dev\/',
                appSubUrl: '',
Navigate to http(s)://YOUR_DOMAIN OR STATIC_PUBLIC_IP (OR localhost:3000).
Here it is!
After that, have to setting your Reverse Proxy Service (I’ll post about that soon and attach link) and you’ll see a first configuration page like that:
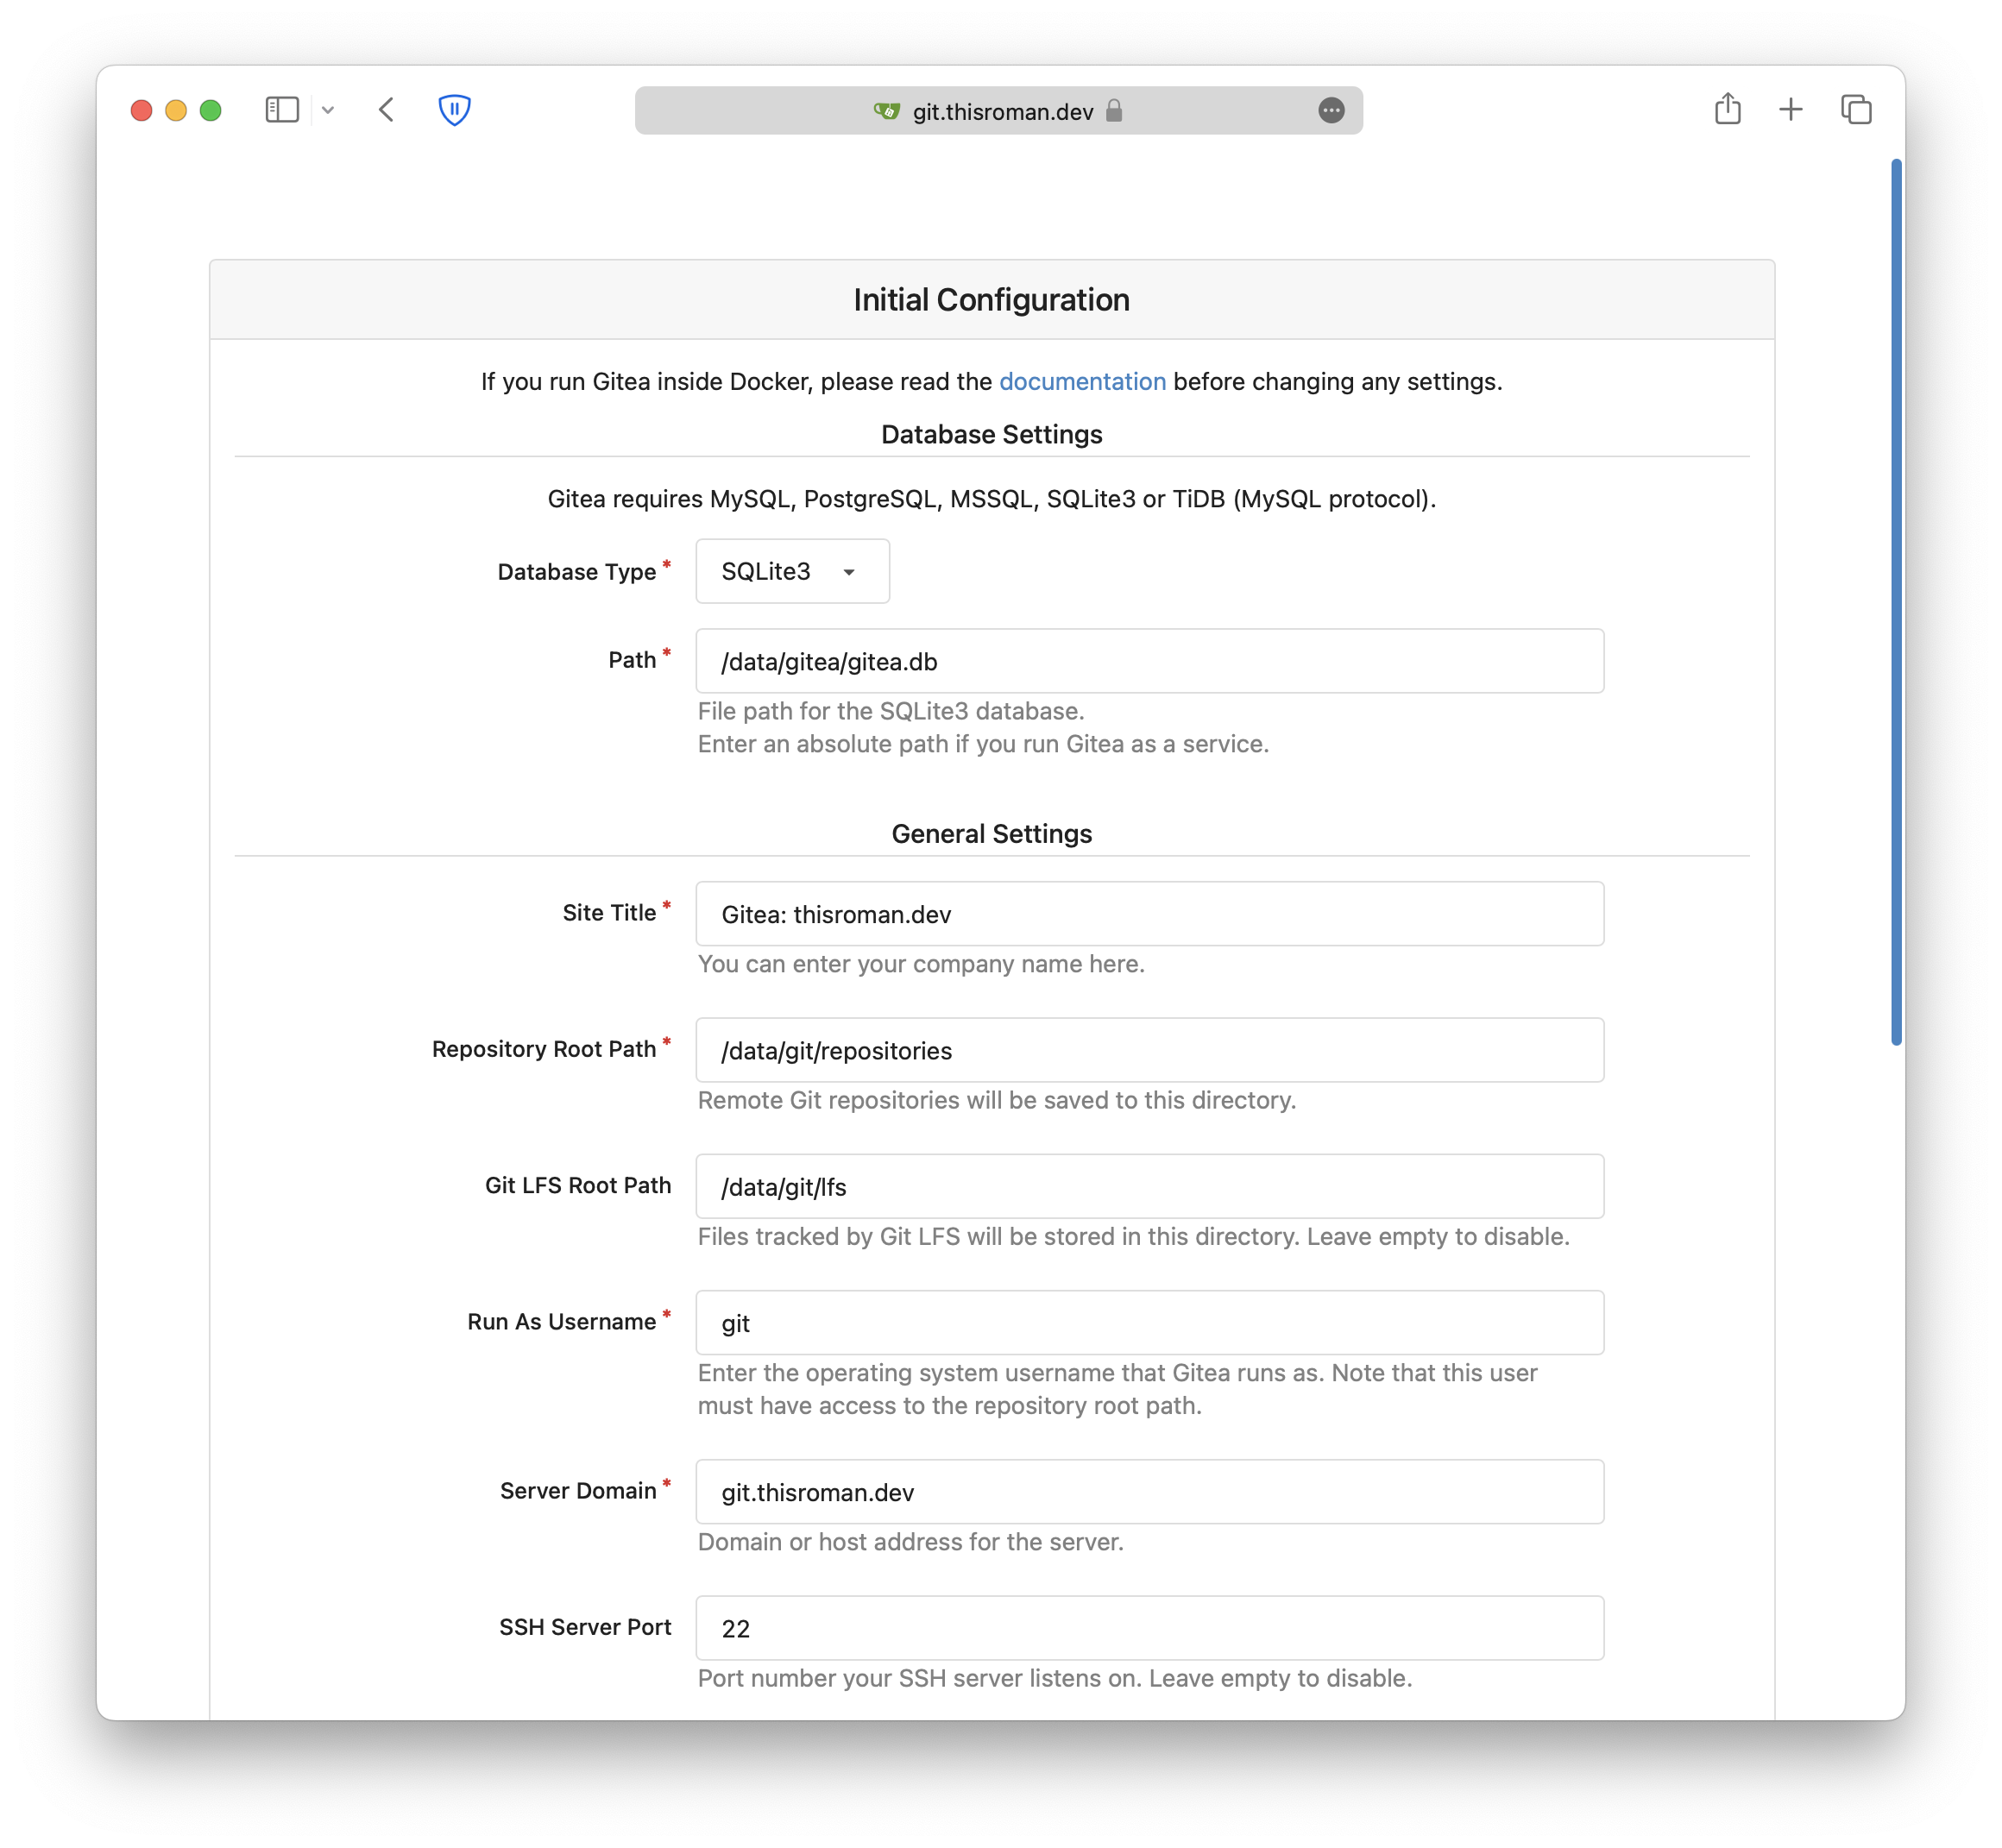
Certain settings, such as the site title, can be customized according to your specific needs. However, for the purpose of this tutorial, you will need to modify the following:
- Server domain: This refers to the domain of your server, which you set up in Step 3.
- Gitea Base URL: This is the complete URL you will use to access Gitea in your web browser, including the protocol. For instance, it should resemble “https://your_domain”.
To get started, you’ll need to create a user account if you haven’t done so already. Simply click the "Need an account?" -> "Register now" link located below the login form to register a new user. Since you’ll be the first user on the system, your account will be created as an administrator. Keep in mind that if you’ve configured email settings during the setup, you might need to verify your account before proceeding.
Once you’re logged in as the newly created user, you can access additional administrative features by clicking on your user icon at the top right corner of the page. From the drop-down menu, select "Site Administration" which will take you to a page where you can perform maintenance tasks, manage user accounts and organizations, and further customize Gitea according to your needs.
Configuring SSHing Shim #
You have to create SSH key for our earlier created user. This key needed only for internal use:
sudo -u git ssh-keygen -t rsa -b 4096 -C "Gitea"
Output should looks like:
ubuntu@code-server-arm:~/Developer/gitea$ sudo -u git ssh-keygen -t rsa -b 4096 -C "Gitea Host Key"
Generating public/private rsa key pair.
Enter file in which to save the key (/home/git/.ssh/id_rsa):
Enter passphrase (empty for no passphrase):
Enter same passphrase again:
Your identification has been saved in /home/git/.ssh/id_rsa
Your public key has been saved in /home/git/.ssh/id_rsa.pub
The key fingerprint is:
SHA256:J0bEn***************************lPLljA Gitea Host Key
The key's randomart image is:
+---[RSA 4096]----+
|**********       |
|****.....        |
|o **********     |
|**************   |
|o.O o ..S . = o  |
|+. +****** = =   |
|.oo   .   o +    |
|******** .       |
|oo.     .        |
+----[SHA256]-----+
I recommend to push Enter on each step and don’t set a password (shim doesn’t work w/ password)
Then, need to add our Gitea user to authorized_keys:
sudo -u git cat /home/git/.ssh/id_rsa.pub | sudo -u git tee -a /home/git/.ssh/authorized_keys
sudo -u git chmod 600 /home/git/.ssh/authorized_keys
So, finally, we need to do some automation:
ubuntu@code-server-arm:~/Developer/gitea$ cat <<"EOF" | sudo tee /usr/local/bin/gitea
> #!/bin/sh
> ssh -p 2222 -o StrictHostKeyChecking=no git@127.0.0.1 "SSH_ORIGINAL_COMMAND=\"$SSH_ORIGINAL_COMMAND\" $0 $@"
> EOF
#!/bin/sh
ssh -p 2222 -o StrictHostKeyChecking=no git@127.0.0.1 "SSH_ORIGINAL_COMMAND=\"$SSH_ORIGINAL_COMMAND\" $0 $@"
Let’s set executable for that script:
sudo chmod +x /usr/local/bin/gitea
See official doc for this: SSHing Shim (with authorized_keys)
Another links to docs:
Summary #
We used Docker virtualization for deploying Gitea on our own server in minutes and with some settings for user and adding key. Also, we can customize front look of the Gitea web interface and set up email notification. I wasn’t show this in the article, but I’ll post in the future more stuff like that. Stay tuned 🫡